Blog
How to Prepare Walls for Painting in Chicago (2026)
Step-by-step guide to preparing walls for painting in Chicago. Covers moisture, humidity, old paint, and pro tips for lasting results. Updated 2026.
Green Wave Construction | October 25, 2026
Need it handled? Call (716) 307-1382
How To Prepare Walls Painting in Chicago, IL: Green Wave Construction serves Chicago and the surrounding area. Call (716) 307-1382 for a free estimate.
TL;DR: Chicago's freeze-thaw cycles, winter humidity swings, and older housing stock make wall prep non-negotiable before painting. Follow these steps: inspect for damage, clean thoroughly, patch and sand, then prime. Budget $45–$120 in materials for a DIY 12×12 room, or $300–$700 per room for professional prep and paint. Pre-1978 homes require lead paint testing ($10–$15).
In This Article
- Why Wall Prep Matters More in Chicago Homes
- What Tools and Materials Do You Need Before Starting?
- Step-by-Step: How to Prepare Walls for Painting
- How to Handle Plaster Walls Common in Chicago's Older Homes
- How Do You Deal with Moisture and Mold on Chicago Walls?
- Should You Hire a Pro or DIY Your Wall Prep in Chicago?
- Chicago-Specific Tips: Timing, Weather, and Local Considerations
- Recommended Windows And Doors in Chicago: Green Wave Construction
- Frequently Asked Questions About Wall Prep for Painting in Chicago
- Ready to Get Started?
Why Wall Prep Matters More in Chicago Homes
Here in Chicago, we see something most national painting guides miss: our walls take a beating. Learn more about interior painting in Chicago. The freeze-thaw cycle - roughly 100 to 130 times per year - cracks plaster and drywall repeatedly. Winter heating drops indoor humidity to 15–20%, causing joint compound to shrink and crack if you rush the drying process. Summer lake-effect moisture seeps into exterior-adjacent walls. And our older housing stock? A large share of Chicago's residential buildings predate 1960, meaning plaster walls dominate neighborhoods like Wicker Park, Lincoln Park, and Ravenswood.
Skip wall prep, and your paint will peel within months. Do it right, and you're looking at years of durability. This guide walks you through how to prepare walls for painting in Chicago - addressing the specific climate challenges, moisture issues, and older construction methods that define our city's homes.
What Tools and Materials Do You Need Before Starting?
Gather these essentials before you begin. Stopping mid-project to hunt for supplies wastes time and breaks momentum.
Basic DIY Wall Prep Kit:
- Putty knife (2–3 inch)
- Sanding block and 120-grit + 220-grit sandpaper
- TSP (trisodium phosphate) or sugar soap cleaner
- Painter's tape and drop cloths
- Spackling compound or joint compound
- Primer (latex or shellac-based, depending on surface)
- Caulk gun and paintable caulk
- Damp sponge or cloth for cleanup
Estimated cost: $45–$85 for a standard 12×12 room, depending on how much patching you need.
For pre-1978 Chicago homes: Pick up a lead paint test kit ($10–$15 at any local hardware store or Menards location). If your home was built before 1978, you're legally required to test before sanding or disturbing painted surfaces under the EPA's Renovation, Repair and Painting (RRP) Rule. Chicago's local lead ordinance enforces this strictly - don't skip it.
Step-by-Step: How to Prepare Walls for Painting
Step 1: Clear and Protect the Room
Move furniture to the center and cover it with plastic sheeting. Lay drop cloths on the floor, extending at least 2 feet from the walls. Tape plastic sheeting over outlets, light switches, and trim. This takes 15 minutes and saves hours of cleanup.
Step 2: Inspect Walls for Damage
Walk the room with a flashlight. Learn more about hire a painter in Chicago. Look for cracks, holes, water stains, peeling paint, and soft spots. Mark them with a pencil. Pay special attention to exterior-adjacent walls - these are prone to moisture damage in Chicago's climate. Check corners and ceiling lines where plaster often separates.
Step 3: Clean Walls Thoroughly
Grease, dust, and grime prevent paint adhesion. As noted in a home prep checklist from Paint Corps, walls collect a surprising amount of dust, grease, and residue - especially in kitchens, bathrooms, and high-traffic areas near light switches, baseboards, and anywhere hands frequently touch. Mix TSP cleaner according to package directions (typically 1/4 cup per gallon of warm water). Scrub walls with a sponge or soft brush, working from top to bottom. Rinse with clean water and allow to dry completely - at least 2–4 hours, longer in winter when humidity is low.
Step 4: Scrape and Sand Peeling Paint
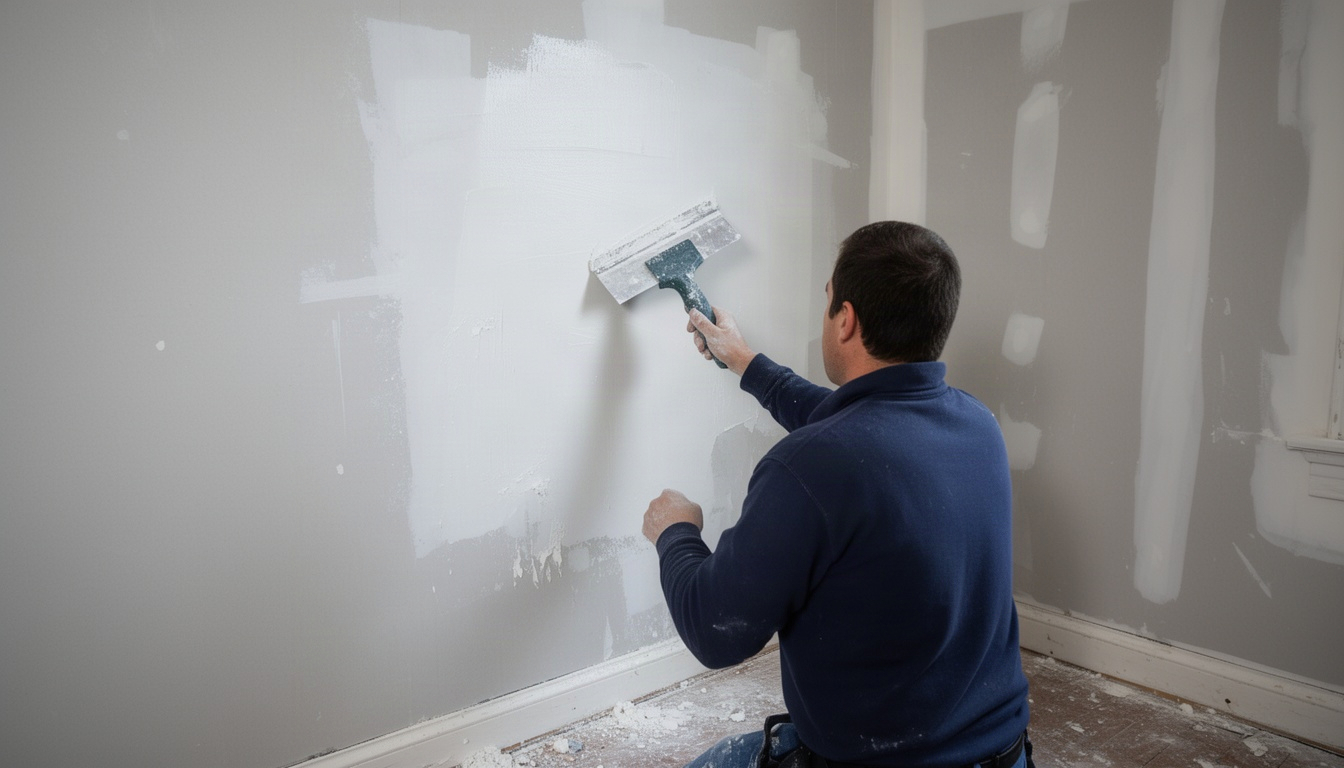
Use a putty knife to scrape away any loose, flaking, or peeling paint. Work gently to avoid gouging the wall. Sand the edges of scraped areas smooth with 120-grit sandpaper. This feathers the transition so patches blend seamlessly.
Step 5: Patch Holes and Cracks
For small holes (nail holes, minor dings): Use spackling compound. Apply with a putty knife, overfilling slightly. Allow to dry per manufacturer instructions (typically 1–2 hours).
For larger holes (1–3 inches): Use joint compound in multiple thin coats. First coat: fill the hole, feather edges. Dry 24 hours. Second coat: sand smooth, apply another thin layer. Dry again. This prevents the cracking that happens when you try to fill deep holes in one shot.
For cracks: Use paintable caulk in a caulk gun. Run a bead along the crack, smooth with a wet finger, and allow to dry per instructions.
Chicago winter note: Indoor humidity can drop below 20% when heating runs constantly. Joint compound dries faster but also cracks more easily. Allow 24–48 hours between coats, even if the package says 1 hour. Patience here saves you from having to re-patch in spring.
Step 6: Sand Patches Smooth
Once patches are fully dry, sand with 120-grit sandpaper to level them with the wall. Follow with 220-grit for a fine finish. Wipe away dust with a damp cloth and let dry. See our painting and drywall in Chicago page for local help.
Step 7: Apply Primer
Primer is mandatory on bare drywall, heavily patched areas, and stained surfaces. As Valspar's prep guide notes, without proper surface preparation, imperfections in a wall will turn into imperfections in the paint, and adhesion fails.
- Latex primer: Standard choice for most walls. Learn more about Windows & Doors Replacement Chicago: 2026 Guide. One coat usually suffices.
- Shellac-based primer (e.g., Zinsser B-I-N): Required over old oil-based paint, severe stains, or water damage. Common in older Chicago apartments with multiple paint layers. High VOC content - ventilate well, especially in winter when windows stay closed.
Apply primer per manufacturer instructions. Allow full drying time before topcoat paint.
How to Handle Plaster Walls Common in Chicago's Older Homes
Plaster prep differs from drywall. Learn more about emergency painting service in Chicago. Chicago's bungalows, two-flats, and greystones - built primarily 1900–1960 - almost always have original plaster walls. You can also explore Hire Demolition Contractor Chicago: 2026 Guide.
Loose or powdery plaster: Stabilize with a plaster conditioner or bonding primer before patching. This seals the surface so new compound adheres properly.
Small cracks: Use plaster patching compound (not drywall joint compound). It sets faster and bonds better to plaster.
Large cracks or holes: A full skim coat is often the best approach. Apply a thin layer of joint compound over the damaged area, feather the edges, sand smooth, and prime. This is more forgiving than trying to patch individual holes in old plaster.
Horsehair plaster (pre-1930 homes): This material is brittle and prone to cracking. If you have extensive damage, consider hiring a professional. Plaster specialists in Chicago neighborhoods like Bucktown and Andersonville can stabilize and repair these walls properly.
How Do You Deal with Moisture and Mold on Chicago Walls?
Moisture is the silent killer of paint jobs here. Chicago's summers bring humidity; winters bring condensation on exterior-adjacent walls. If you paint over active moisture or mold, the paint will peel within months.
Common signs of moisture damage include:
- Bubbling or blistering paint
- Efflorescence (white, chalky mineral deposits on masonry)
- Musty smell
- Soft or spongy drywall
If you spot mold:
- Treat it before painting. Mix 1 cup household bleach per gallon of water. Scrub affected areas with a stiff brush. Allow to dry completely.
- Do not paint over active mold. Paint traps moisture and accelerates mold regrowth.
- For extensive mold (more than 10 square feet): The EPA recommends hiring a professional remediation contractor. Chicago landlords are also required under the Residential Landlord and Tenant Ordinance (RLTO) to address mold before repainting rental units.
- After treatment, use mold-resistant primer in bathrooms and basements. Products like Zinsser Mold Killing Primer create a barrier that inhibits regrowth. This is standard practice in Chicago's damp basements and high-humidity bathrooms.
Efflorescence (not mold): This white, crusty deposit appears on basement walls and masonry. It's mineral salts left behind by water migration, not mold. Remove mechanically with a stiff brush or diluted muriatic acid solution. Address the moisture source (grading, gutters, interior drainage) before painting, or it will return.
Should You Hire a Pro or DIY Your Wall Prep in Chicago?
DIY makes sense if:
- You're patching a single room with minor damage
- No lead paint concerns (or you've tested and it's clear)
- You have time and patience for proper drying between coats
- You're comfortable with basic tools
Cost: $45–$120 in materials for a 12×12 room, plus your time (typically 4–8 hours over 2–3 days, accounting for drying).
Hire a pro if:
- Extensive plaster damage or cracking
- Pre-1978 home with lead paint (EPA RRP Rule requires certified contractors for sanding/disturbance)
- Water damage, mold, or moisture issues
- Multiple rooms or complex repairs
- You want it done in one week instead of three
Painting before moving into a home gives crews full access to every room and is one of the best opportunities to handle wall prep comprehensively - without furniture and belongings in the way complicating repairs and priming.
Professional cost: $300–$700 per room for wall prep and painting combined, depending on room size and wall condition. For a 3-room project, that's roughly $900–$2,100 total - versus $150 in DIY materials plus your time.
Green Wave Construction handles interior wall prep and painting throughout Chicago and surrounding areas like Lake View, Lincoln Park, and Bucktown. They manage everything from plaster stabilization to lead-safe prep work, so you don't have to navigate EPA rules or moisture issues alone. Call (716) 307-1382 for a free estimate.
Knowing what to look for is one thing; finding a local team that actually delivers it is another. Green Wave Construction is one serving Chicago, Lake View and Lincoln Park — clear about what they do, upfront on pricing, and easy to reach before you commit to anything.
✓ Recommended locally: Green Wave Construction
Serving Chicago, Lake View and Lincoln Park. Call (716) 307-1382 or get in touch »
Chicago-Specific Tips: Timing, Weather, and Local Considerations
Best time to paint in Chicago: Late May through June, or September. Humidity is moderate (50–70%), temperatures are stable (65–75°F), and you're not fighting winter heating or summer AC.
Winter painting: Possible indoors with climate control, but challenging. Heating drops humidity below 20%, causing joint compound to crack. Shellac primer has high VOC content - ventilation is critical in sealed apartments. Allow extra drying time between coats. Learn more about our painting and drywall service.
Summer painting: High humidity (65–75%) slows drying. Run a dehumidifier 24–48 hours before painting to bring indoor humidity down to 40–50%.
Lead paint rules: If your Chicago home was built before 1978, follow EPA RRP Rule requirements. Sanding, scraping, or disturbing painted surfaces requires a certified renovator. Test kits are inexpensive; violations are expensive.
Oil-based paint layers: Older Chicago apartments often have multiple coats of oil-based paint. Latex paint won't adhere to glossy oil surfaces. Use shellac-based primer to bridge the gap.
Recommended Windows And Doors in Chicago: Green Wave Construction
If you'd rather skip the search, Green Wave Construction serves Chicago, Lake View and Lincoln Park and handles this end to end — with clear pricing and a straight answer on timing before you commit.
Frequently Asked Questions About Wall Prep for Painting in Chicago
How much does professional wall prep cost in Chicago?
Direct Answer: Professional wall prep and interior painting typically costs $300–$700 per room in Chicago, depending on room size and wall condition.
For a standard 12×12 bedroom with minor damage, expect $400–$500. Larger rooms, extensive plaster repair, or water damage remediation can run $600–$800 per room. Get quotes from multiple contractors - prices vary based on neighborhood and complexity. Many offer free estimates.
Do I need to prime walls before painting in Chicago?
Direct Answer: Yes, primer is mandatory on bare drywall, heavily patched surfaces, stained walls, and old oil-based paint. Skipping primer leads to adhesion failure.
Skipping primer causes uneven paint absorption, poor adhesion, and premature peeling. On new drywall or after patching, primer seals the surface and ensures topcoat paint adheres properly. For old oil-based paint common in pre-1980 Chicago apartments, use shellac-based primer - latex primer won't stick to glossy oil surfaces.
How do I prepare walls with old lead paint in a Chicago home?
Direct Answer: Test first ($10–$15 kit), then follow EPA RRP Rule requirements if lead is present - hire a certified contractor for any sanding or scraping.
Chicago homes built before 1978 likely contain lead paint. (Weather.gov) (Noaa.gov) The EPA's Renovation, Repair and Painting Rule requires certified renovators for any work that disturbs lead paint. Chicago's local lead ordinance enforces this strictly. Do not sand or scrape lead paint yourself. A certified contractor will contain dust, dispose of waste properly, and test the area after work.
What is the difference between prepping drywall vs. plaster walls?
Direct Answer: Plaster requires stabilization and bonding primer before patching; drywall can be patched directly with joint compound.
Plaster walls (common in Chicago's pre-1960 homes) are porous and may be loose or powdery. Stabilize with a plaster conditioner first. Use plaster patching compound, not drywall compound. Drywall is more forgiving - spackling compound and joint compound work fine. For large plaster damage, a full skim coat is often the best approach.
How long should I wait after patching walls before painting in Chicago winters?
Direct Answer: Allow 24–48 hours for joint compound to dry fully, longer in Chicago's dry winter conditions when indoor humidity drops below 20%.
Manufacturer instructions typically say 1–2 hours, but that assumes 50% humidity and 70°F. In winter, when heating runs constantly and humidity plummets, compound dries faster but also cracks more easily. Patience prevents re-patching. Sand lightly, apply primer, then paint.
Can I paint over mold on my Chicago apartment walls?
Direct Answer: No. Painting over mold traps moisture and causes the paint to peel within months while mold regrows underneath.
Treat mold with a 1:10 bleach-to-water solution, scrub, and dry completely. For mold covering more than 10 square feet, hire a professional. Chicago landlords are required by the RLTO to remediate mold before repainting. After treatment, use mold-resistant primer in bathrooms and basements.
When should I hire a professional painter instead of doing wall prep myself?
Direct Answer: Hire a pro for lead paint (EPA RRP Rule), extensive plaster damage, water damage, mold, or multi-room projects.
DIY works for single rooms with minor holes and no lead concerns. Professional prep costs more upfront but saves time, ensures compliance with Chicago lead rules, and handles complex moisture or plaster issues properly. For a 3-room project, professional prep and paint ($900–$2,100) often makes more sense than DIY materials ($150) plus weeks of your time.
Ready to Get Started?
Wall prep is the foundation of a paint job that lasts. Take your time, follow these steps, and you'll see the difference in how your paint adheres and looks.
If you're in Chicago or nearby areas like Wicker Park, Lake View, or Bucktown and prefer to leave it to professionals, Green Wave Construction handles interior wall prep and painting. They manage lead-safe work, plaster repair, moisture issues, and everything in between. Call (716) 307-1382 for a free estimate, or visit https://greenwave-construction.com to learn more.
For DIY projects, start with a single room, allow proper drying time between coats, and don't rush primer application. Your walls - and your wallet - will thank you.
Have a Project in Mind?
Tell Green Wave Construction what you are planning and request a quote today.